Showing posts with label Polyester fabric. Show all posts

Saturday, February 16, 2019

A New Purse

My usual purse was showing signs of wear.  It was time to make a new one.

Like a lot of my previous purses, this one is made of polyester microsuede.  It's a material that stands up well to a lot of abuse and can be laundered (regular cycles as well).  For this one, I used the same pattern as for the ham radio operator's purse.

Here's the pattern:
Yes, that's all of it.  Just add pockets as desired on the inside and a 2" strip to make the handle.  The linings and facings are made with just sections of this basic piece.  I've deliberately made this purse small.  That way, it doesn't collect junk!  All the things I really need fit, but not much else.

The lining is a polyester/cotton broadcloth.  I keep that fabric in my stash, in a variety of colors.  It's often used for applique, but it's useful for linings and pockets on a variety of projects, too.

I  decided to make the lining of this purse with just one pocket, sized for business cards.  Those don't do well in the jumble of other things in my purse.

The embroidery pattern is from Embroidery Library, the Jacobean Hibiscus Oval.

One friend liked this purse so much, he asked me to make him another one, in purple, for his sister.   I think I like the purple even better than the green!
Come back next week for more fun with a sewing machine!

Saturday, January 12, 2019

Warm Coat Part 2

Last week, I was describing the coat I'm making for a winter trip to Baltimore.   Here's the coat, all complete and ready to go.


The coat has a lining of ripstop nylon to help it be windproof.  Fleece may be a very cozy fabric, but a strong wind will go right through it.

The coat is double breasted; there's a lot of overlap between the two front pieces.  There's a hidden button closure on the inside flap of the front.  It's exactly underneath the decorative button on the front.  

This coat also features a notched collar.  These are a bit tricky to get right, but fortunately, fleece is a very forgiving fabric.  If it was made from wool, then a steam iron can be used to make wool do just about anything.
Come back next week and see the project I've been working on for months.  It got invited to a major academic math meeting, which is why I'm headed north in the winter!

Saturday, January 5, 2019

Warm Coat

I'm headed to Baltimore in January to show off one of my sewing projects.  You'll get to see that and the process of making it soon.  I know just how nasty Maryland can get in the winter and I need a warmer coat.  I have this lovely purple boiled wool sitting in my closet, earmarked for a warm winter coat.  I thought I even had a a pattern picked out, McCall 6800, the one I used to make this coat.  There's just one snag -- the sleeves.  After careful measurements, it turns out the sleeves aren't big enough.  That's not a problem with the green coat, where the fabric is a stretchy fleece, but with the wool it would be. This green coat looks warm, but it has the problem that neither the outer fabric nor the lining is particularly windproof.  It's great on a still night, but get a breeze and a windchill and it's not so warm.
It's certainly possible to modify a lot in a pattern, but my experience is that making two piece sleeves wider is pretty tricky and I certainly don't want to ruin the the wool.  It was time to start over and get a new plan.

I found this pattern, Vogue 9289.  (Fortunately, Vogue patterns were on sale that day.)  It's got two piece sleeves that are cut quite a bit wider. 

This sort of pattern isn't very efficient on the fabric, so there wasn't enough of the wool to make this work.  My local fabric store had literally no heavy, windproof fabric that I liked.   But, fleece was on sale.  I reasoned that maybe if the lining was windproof, the result would be reasonably warm.  (Yes, I know you loose some of the insulating properties of the fleece by doing it this way.)  

I picked an astronomical print for the coat.  It's got lots of planets and spiral galaxies -- perfect for someone like me!


For the lining, I chose ripstop nylon, a thin but very windproof fabric for the lining.  It's used for back packing tents and sometimes windbreakers, but I've never seen it used as a lining before.


Just cutting out the coat was a challenge.  Because the side front and side and back pieces are so wide, the fabric could not be folded and cut.  It had to be laid out on the floor and each piece individually cut.  I had just enough room in my living room to make this work.
Come back next week and see how it turned out!

Saturday, November 10, 2018

Jacket with White Satin Trim Part 2

Last week, I talked about the decorative trim for a jacket that I am making.  This week, we see how the jacket went together.
I started with Vogue 1493.
The home made bias tape isn't just used for trim.  The seams are bound with the bias tape, rather than finishing them with an overcast stitch.
The sleeves have an usual shape, with the large and ornamented lower sleeves.  The seam comes to a sharp point.
This seam is made possible by clipping the upper sleeve almost to the seam line.
Here's the completed sleeve.
The upper part of the sleeve is a fairly standard shape, so it sews easily to the jacket.
The front band also proved to be fairly easy to attach.
The final step is to make 1" bias tape and attach it at the front band/front seam.  It turns out that 1" bias tape is more difficult to deal with than the 1/2" variety.  Also, if you try to feed a strip that's too wide into the bias tape maker, the fabric can end up melted (it is polyester) and ruined.  The stuff is squirrelly when you try to attach it also, note all of the pins.
The jacket did get finished.  Now I have something to wear to the Huntsville Symphony Orchestra concert!

Come back next week for a report from the Houston International Quilt Expo.

Saturday, November 3, 2018

Jacket with White Satin Trim Part 1

Were you wondering about all the white satin trim from a previous post?
I saw this interesting jacket, Vogue 1493, and saw that it made use of some techniques I hadn't tried before. I decided to see if I could make it work.  Note that this is listed as an "advanced" difficulty pattern, a good sign that there's one or more steps here that is challenging to make work right.
   I choose a teal stretch denim for the jacket and white satin for the trim.  That gives a lot more contrast that the colors of the jacket on the front of the pattern envelope, but then, subtle isn't really my style.

Thank goodness I had extra fabric!  I think it came off the end of the bolt.  I made enough cutting errors that I had to redo some things and I ended up needing all the fabric I had.

As described in a previous post, making the white satin trim proved to be the difficult step.  The satin is made into 1/2" bias tape and then sewn to the lower sleeve sections and the front band in a pattern that looks random.

The pattern gives very detailed instructions for making the "random" design of lines of trim.  In this sleeve section, I've traced the lines from the pattern.  The pattern also specifies the order in which the lines of trim are to be sewn.  The right and left sleeves are different, as are the right and left front bands.
Sewing on the white trim proved to be fairly straight forward.  It did involve a great deal of top stitching.  Here's a lower sleeve section in process.
The front bands were easier than the sleeves.  There were just and many lines of trim, but most of them were shorter.  Here's the front band, lined with more white satin, ready to be sewn onto the jacket.
Come back next week and see how the jacket goes together, now that most of the trim is done.

Saturday, August 18, 2018

A New Fish Joins The School

I've been experimenting with creating stuffed fish for children's toys.  I decided it was time to add another fish to the collection.


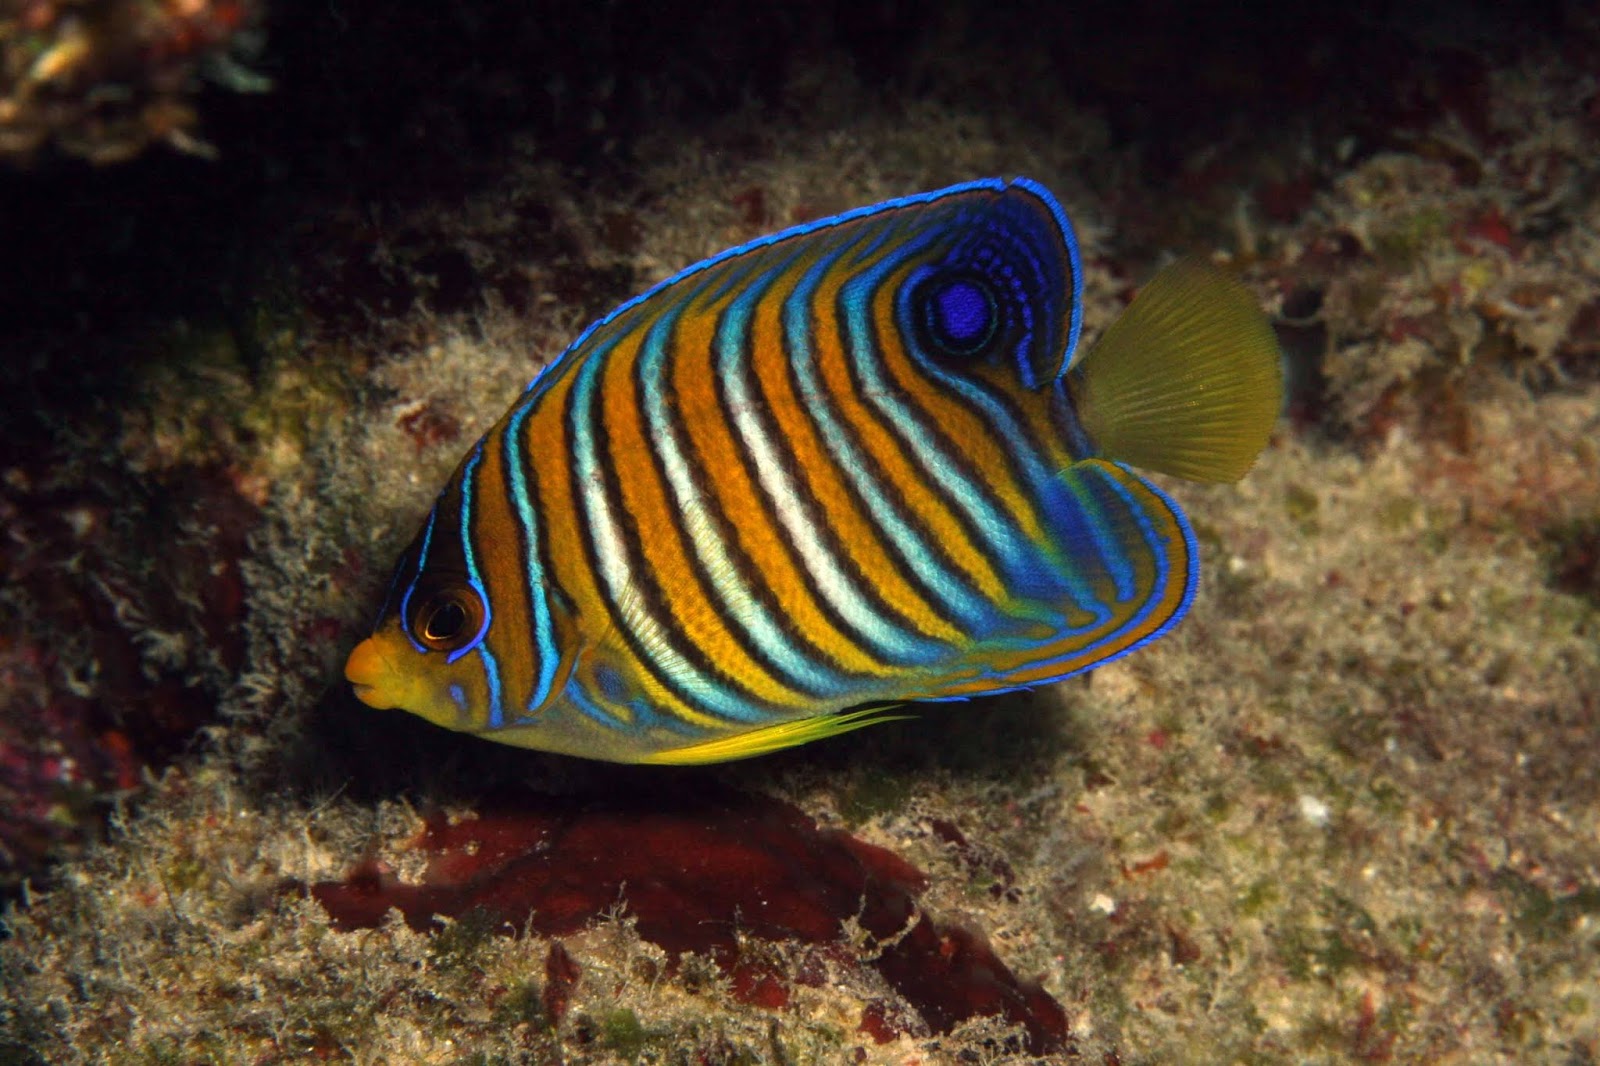
This fish is a Regal Angelfish, another colorful Indo-pacific species.

The process begins with a photograph, again one of my own.

Using Floriani Total Control embroidery design software, I'm able to define lines and regions from the photograph and then figure out how to embroider them.  Since the fish is more orange than any other color, I'm starting with plain orange fabric.

Once the embroidery design is complete, I end up with a file like this:


Now all that remains is to sew it out.  Easier said than done.
 Things went wrong on this attempt.  The hoop hit a wall and the sewing machine lost track of exactly where it was at.    The registration of the various pieces is now wrong, since the yellow ring is supposed to go around the black circle of the eye.  There's no fixing this, it's a do-over, after moving the machine farther from the wall!

This attempt looks better, but a closer look reveals new issues.

When the design was scaled up from the size of the photograph to the size desired for sewing, the white stripes and black edges acquired some distance between them.
If you didn't know this fish, you might not think this was a problem, but I'm a stickler for my fish.  This problem had to be fixed with quite a bit of work back in the design software.

Finally, all the pieces came together and I produced a good fish and it's mirror reverse, for the opposite side.
I just sew these together, stuff them, and there's a good toy for a baby.  It's 100% washable, with nothing to fall off and get swallowed.  Lots of kids get Teddy Bears, but how many end up with a very realistic stuffed fish?  Only a few.

Come back next week for a new home decorating project.

This blog has been on hiatus while I dealt with moving to a new house.  it will continue weekly in the future.