Saturday, April 6, 2019

New Tools: Invisible Zipper Foot

It's fun to try out new sewing tools and sometimes you find something that's just very useful.  This is one of  those cases.


I've sewn garments for many years, but I've never actually used an invisible zipper foot.  In fact, I've actively avoided garments that required invisible zippers. I tried installing one with a regular zipper foot, with not very good results.


I bought a Viking Husqvarna invisible zipper foot to use on my machines, which are all Vikings.  I'm making a dress with an invisible zipper, so this seemed like an excellent time to try it out.
The zipper good has a large ridge down the middle which pushes the zipper coils to the side as you sew.  First you sew down one side.
Then you sew down the other side.  The needle stays in the middle while sewing, but the zipper coil moves to the other side of the center ridge when you move to the other side.

A regular zipper foot is used to start the seam at the bottom of the zipper, then a regular foot can be used.
The final result is fabulous: an invisible zipper!  I'll be using this technique again!  

Come back next week for more fun with a sewing machine.  You might even get to see the rest of the dress.


Saturday, March 23, 2019

Free Standing Lace Dodecahedron

My latest project is a tribute to Greek mathematics in free standing lace.  Last week, I showed my attempts to create a pentagon with the letter pi on it.   This week, I've made 12 of them, each with a different Greek letter with special significance in mathematics.  12 pentagons make a regular dodecahedron, one of the 5 Platonic solids.


I'm into color, so I decided to use color to introduce new symmetries.  I used a total of 6 colors: red, orange, yellow, green, blue and purple.  In each case, the web part of the lace is one color and the Greek letter and edge of the lace are a different color.  If you require the web and the edge to be one color apart on the color wheel, there are exactly 12 possible combinations and I used all of the exactly once.

Here's all 12 pentagons laid out in one possible configuration.

I required that at each edge of the dodecahedron, the pentagons that meet had to have different web and edge colors.  That drastically reduced the possible number of arrangements of the pentagons and made for a pleasing distribution of colors.

The pentagons are sewn together by hand with invisible thread.  That thread proved to be difficult to work with, but I got the job done.

I bought clips a while back for a different project, but this seemed like a perfect time to use them.
These aren't the fancy fabric clips, just paper clips from an office supply store.

Visualizing the finished product from a flat arrangement proved to be challenging.  Putting the whole thing together with the clips was very helpful.
I'm still not pleased with the finished product.  Unlike the cube, the edges aren't all that straight and the the whole thing has a somewhat lopsided appearance.  I'm working on creating a stiff framework for the pentagons.

Come back next week for a completely different project.

Saturday, March 16, 2019

Pi and Pentagons

Happy Pi Day (March 14).   This week, I'm working on a new project with pentagons and Greek letters.  Of course this includes the most important Greek letter for geometry, pi.


It took quite a while to figure out the right colors of thread to use for this project.  My previous free standing lace project used variegated thread at it turned out very well.  For this project, I digitized all the designs myself, so the texture of the lace turned out a bit different.

When I tried this will all one color variegated thread,  it just didn't work.  The pi didn't stand out particularly.
I tried using contrasting colors of variegated thread, in this case yellow/white, orange/white, and red/white.
This really didn't work either, and the lace is starting to get a plaid look.  Definitely not what I was going for.

I tried a solid color thread.
The lack of contrast didn't thrill me.

I tried black and white for maximum contrast.
This is starting to go somewhere, but it's pretty boring in the color department.

I finally tried the yellow/green mix at the top and that was about the effect I was hoping for.

Come back next week for an update on what this is all for.

Saturday, March 9, 2019

Ironing Board Cover

I decided my ironing board cover needed some upgrades.
The old one, which came with the ironing board, never could seem to stay all the way on the top. 
It also had foam padding that, after many years, had gone flat, stretched, and just wasn't conforming well to the shape of the board.
The concept was to fix these issues and maybe even make things better than new.

My cousin Suzy, who is really into quilting (check out her web page here) commented that covering an ironing board with flannel was a great way to keep her complex applique pieces from stretching when ironed.  That seemed like good guidance for the type of material to choose.  I used a 100% cotton flannel.  That will stand up to any temperature I'd normally run my iron at, since I rarely work with linen.   I found a light hearted design with mermaids that suits the other colors in my sewing room.  For padding, I had some 100% batting in my stash from some forgotten project.

First, I cut the batting in the shape of the ironing board top.
Next, I cut the flannel with 2" extra around the batting.
To stop the batting from sliding under the flannel, I quilted the two together.  I didn't do anything fancy here, just used a built in stitch from my sewing machine.  I chose one that was curvy vaguely suggested waves to me.

Next, I sewed double fold bias tape all around the cover.  I included some strong string in the bias tape to use for gathering the cover on the bottom side of the board.
Installing the cover was a snap -- just put in on the board, draw the string, and tie it tight.

I've had a chance to use the refurbished ironing board an it's awesome.  Nothing ever slips and slides off my ironing board, which had been a problem sometimes.  It's got just the right amount of padding and it even fits my style.

Come back next week for more fun with a ραπτομηχανή (sewing machine)!

Monday, March 4, 2019

Whale Shark Towel

A friend asked if I could decorate a towel with the image of one of his favorite sea creatures -- the whale shark.


He already had a design, but it required a little modification to eliminate extraneous background items.   The towel came from Walmart.  I chose a blue one, because this is a creature of the open ocean.

To work with a loopy fabric like terry cloth, you need to use not just a stabilizer, but also a topper, to keep the loops matted down while you stitch.  It's also necessary to use water soluble materials, so that you can just wash them away once the embroidery is done.  I chose to use the fibrous Rinse Away Mesh from Embellish on the bottom.  This wonderful stabilizer stands up well to a lot needle punches.  On the top, I used Ultra Solvy by Sulky.  It's a lot heavier than you'd typically use for a topper, but I have plenty of it left over from other projects.  It turned out to be very helpful to use this material after I accidentally started stitching the whale shark upside down -- the heavy topper made it possible to rip out those stitches!

Here's the bottom of the embroidery hoop, with the Rinse Away Mesh.
Here's the beginning of the stitch out, showing the Ultra Solvy.
Since this embroidery will be seen from both sides, I used the same thread in the needle and in the bobbin.  This is the underside, with a few wisps of the the Rise Away Mesh still around the design.  A trip through a sink full of water made that go away.
Come back next week for a project for your sewing room!

Saturday, February 23, 2019

Lace Cube

The success of my previous effort in mathematical art, the Embroidered Tessellations, has inspired me to try other things.
There's an infinite variety of mathematical shapes and surfaces that can be constructed from polygons.  Often, 3D models are constructed from paper or even 3D printed.  What if these were instead made from something that's at least partially transparent? 

The modern embroidery machine is capable of making free standing lace, basically embroidery without the fabric.  With a sufficiently sophisticated embroidery design program, it's possible to make lace in all kinds of shapes and designs.   This seems like something fun to explore!

For my first effort, I decided to keep things simple.  I bought a square free standing lace design from Embroidery Library.   Six squares can be combined into a simple 3 dimensional shape: a cube.

The free standing lace is sewn onto a water soluble stabilizer.  This keeps the lace together during the construction process.  Here, I'm using a fibrous stabilizer from the Embellish line from RNK Distributing.  It holds together a lot better when there's a lot of needle punches than some of the more plastic-like water soluble stabilizers.


 Here's the finished piece.

At this point, the excess stabilizer is trimmed and the whole thing thrown in a sink of cold water for a few minutes.  All of the stabilizer just dissolves away.

Unfortunately, the result is anything but flat.  I solved this problem by mostly drying it out with a hot iron.  Using a pressing cloth was a necessity.  The lace wanted to stick to the iron.

In the end, I had six squares.  All of the them were sewn with a single spool of thread.  The color variations come from using variegated thread.

Come back next week for more fin with a sewing machine!  Soon, I'll be designing my own lace and it won't all be squares.

Saturday, February 16, 2019

A New Purse

My usual purse was showing signs of wear.  It was time to make a new one.

Like a lot of my previous purses, this one is made of polyester microsuede.  It's a material that stands up well to a lot of abuse and can be laundered (regular cycles as well).  For this one, I used the same pattern as for the ham radio operator's purse.

Here's the pattern:
Yes, that's all of it.  Just add pockets as desired on the inside and a 2" strip to make the handle.  The linings and facings are made with just sections of this basic piece.  I've deliberately made this purse small.  That way, it doesn't collect junk!  All the things I really need fit, but not much else.

The lining is a polyester/cotton broadcloth.  I keep that fabric in my stash, in a variety of colors.  It's often used for applique, but it's useful for linings and pockets on a variety of projects, too.

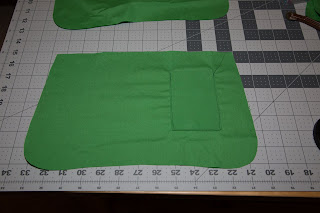
I  decided to make the lining of this purse with just one pocket, sized for business cards.  Those don't do well in the jumble of other things in my purse.

The embroidery pattern is from Embroidery Library, the Jacobean Hibiscus Oval.

One friend liked this purse so much, he asked me to make him another one, in purple, for his sister.   I think I like the purple even better than the green!
Come back next week for more fun with a sewing machine!