Showing posts with label decorative stitches. Show all posts

Saturday, November 24, 2018

Long Sleeve Knit Shirt

I've been looking at shirts that work with mid-rise pants, the kind that seem so popular in stores.  As everyone else has already figured out, they don't work well with shirts that are supposed to be tucked in.  So, much of my winter wardrobe is in need of changes.  T For fabric, I choose a cotton-polyester interlock.  This fabric is easy to work with, durable, and warm for winter wear.


 The usual sort of very loose tops don't appeal to me much.  I can see why y'all wear them, but it's not my style and it doesn't look good on me either.   I went looking for some other sort of solution and found Kwik-Sew 4216.  This looked like an interesting compromise between a fairly fitted top and one that would work with the despised mid-rise pants.  It has a fairly fitted top, a waist seam at the true waist and a peplum.
The pattern envelope show tops in interesting prints, but I chose a plain solid fabric, perfect for embellishment.  A shirt neckline is a perfect place to add embellishment, in this case machine embroidery with a pattern from Embroidery Library called Celtic Diamonds neckline. I used the V- neck version.
It's important to get the embroidery lined up just right.  Using a template, a 100% scale version of the design on paper helps a lot.  As you can see, I did the embroidery before sewing the shirt together.
The peplum offered some other options for embellishment.  The asymmetric hemline is one of the attractions of the shirt, so why not emphasize it?  This simple built in decorative stitch did the trick.
How did the shirt turn out?  It does work quite well with the mid-rise pants and gives me some wardrobe options.  I wish I'd cut it to a smaller size, however.  It worked well enough I might give this pattern another spin later.  It has a short sleeve version, which could work well for a summer shirt.

Come back next week and see what sewing happened at my house over the holiday weekend!

Saturday, April 7, 2018

Wrap Dress with Applique

Last Sunday was Easter and that's a day when a lot of lovely dresses come out of the closet.  It was no exception for me.  I didn't make a new dress, but wore one originally made for an event last summer.
The dress started out as Simplicity 8137, a simple wrap dress.   I didn't like the sleeve, so I changed it out for a flutter sleeve -- a very full, short sleeve.  I also had to modify the dress to fit me.

 The dress is made of polyester-cotton broadcloth, which has very little stretch, so proper fitting is required.  This material has a couple of advantages for this project.  First, it's quite inexpensive and when a dress requires 5 yards of fabric, that starts to matter.  Also, it's a perfect material for embroidery and applique, something like the island inspired skirts I've been making. 

This dress is something of a mixed technique project.  It includes machine applique, hand guided applique and decorative stitching.  The basic design is a flowering vine that accents the main features of the dress, curling along the front and neck openings.  The vine itself is far to big for machine applique, so it's hand guided applique.  The skirt section and the top section of the vine are each a single piece of fabric, bonded to the blue fabric and then stitched with a close spaced zig-zag stitch.

The leaves and flowers are machine applique with embroidered accents.  Both designs are from Embroidery Library.  The leaf is here and the flower is here.  The colors for the flower were chosen to contrast nicely with the blue and the green and also to go with a bracelet I wanted to wear with the dress, which has lapis lazuli, peridot, and garnet.   Each of the leaves and flowers were individually placed.  The leaves have stems.  The flowers do not, so I added those before placing the flowers.

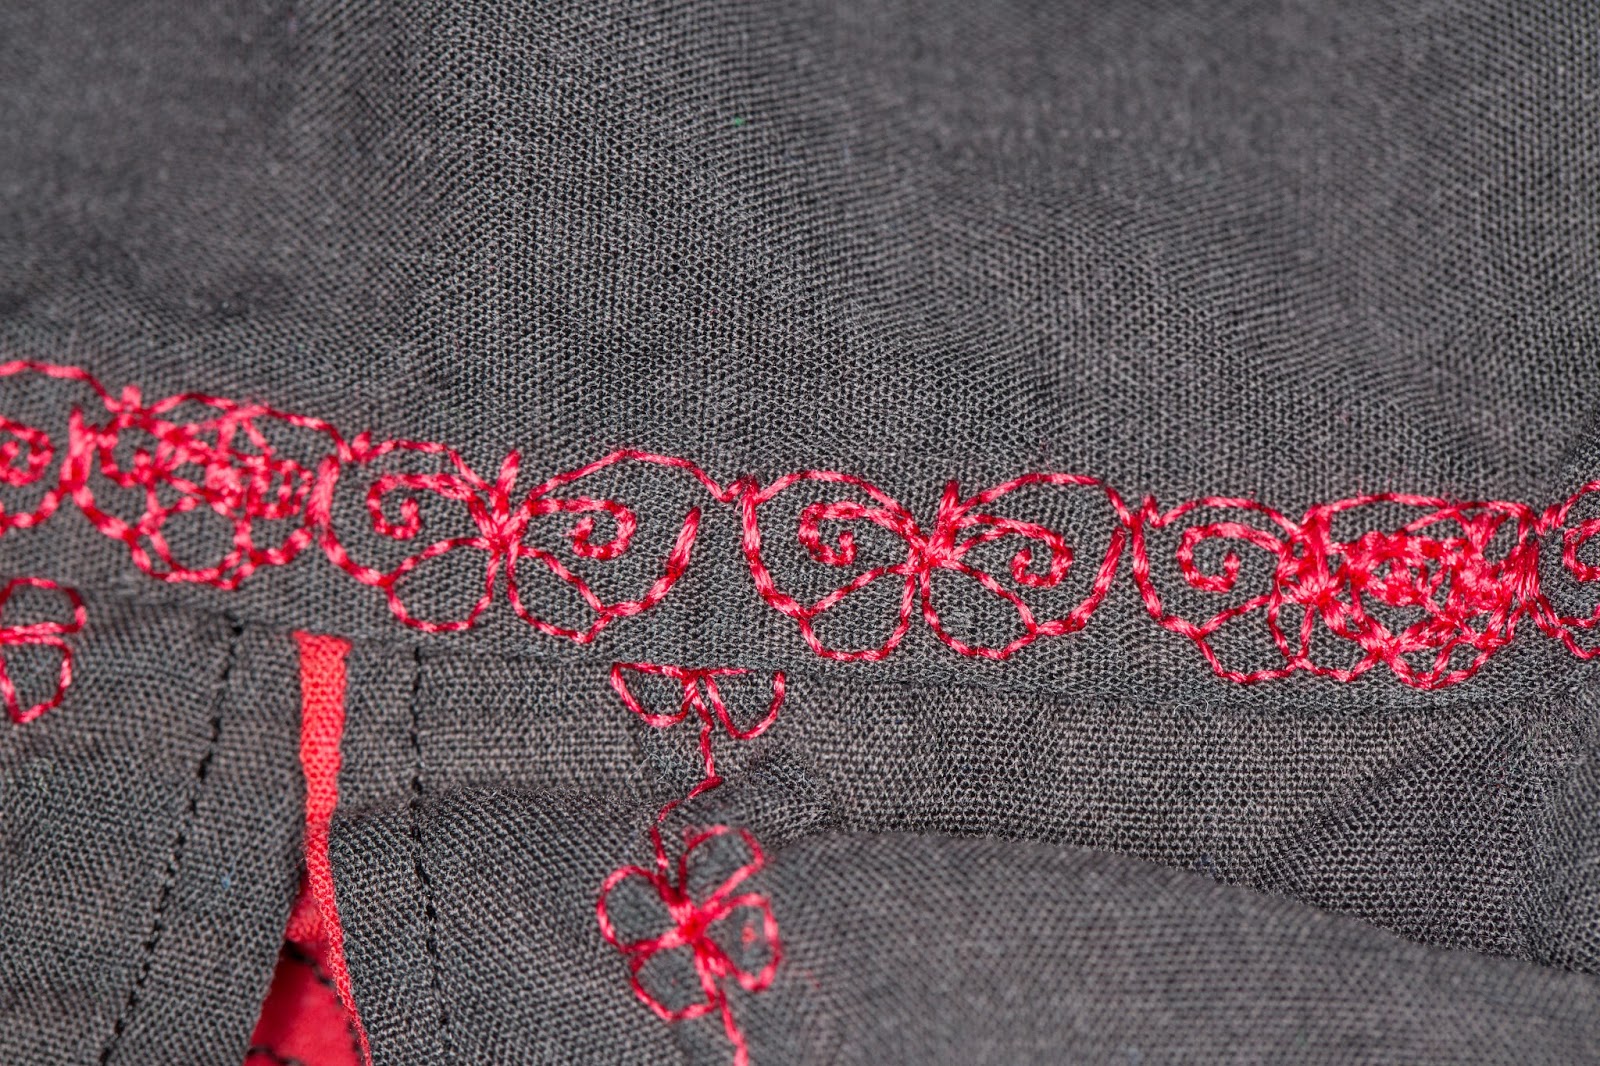
Finally, I added decorative stitching to the hem of the dress and the sleeves.  It's a built in decorative stitch on my machine.
Come back next week for more fun with a sewing machine.

Saturday, March 31, 2018

Island Inspired Skirts Part 2

After making a few skirts that matched the Micronesian skirts in proportions and pattern, I decided to try something a bit different.

This skirt retains the strong colors of the Micronesian skirts and the proportions of a piece 22" wide and one 11" wide.  However, the narrower piece is on the top and the wider piece is on the bottom, reversing the original arrangements. The result is basically a yoked skirt.  It does tend to emphasize the width of the hips, which is definitely not a part of Micronesian design, but can be seen in traditional Polynesian dance attire.  The bottom uses box pleats, with the interior of the pleat in a contrasting color.  I've never seen box pleats used in Micronesian design.  Another thing that does carry over is creative use of built in decorative stitches.  This skirt has no applique or embroidery.
The lower skirt panels are decorated with built in decorative stitches from my Husqvarna Designer SE.  To help them stand out, I used embroidery thread rather than regular sewing thread.  This thread is a bit shinier.

The seam at the bottom of the upper panel is decorated with a butterfly stitch.  I have used this stitch on a number of skirts.

This skirt uses the same general yoke and box pleats as the previous one.  However, in a nod to the Micronesian designs, the hem is not straight.  The outer blue panels are decorated with single color embroidery.
The designs are from Embroidery Library.  There are 4 different, related designs used on the skirt.  In a nod to the blue and green colors, they are all water related designs.  As with the black and red skirt, the colors of the decorative stitching picks up the other color in the skirt.

Come back next week for some more twists on island inspired skirt design.