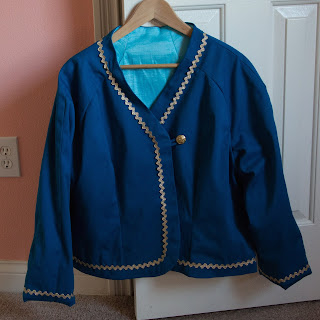
The next step of the project was to completely take the jacket apart, then reassemble it with proper seams.
After that, I added the rickrack around the edges of the jacket and also around the bottoms of the sleeves. This has to be added before the lining is attached. Normally, trim is attached with a thread that matches the trim. I have some metallic embroidery thread nearly the same color as the rick rack.
While using this thread made the stitching nearly invisible, sewing through the trim tended to shred the thread. I had to stop and fix problems with the thread many times.
The next step is to construct the lining. I was planning on using a very standard lining material for the jacket, but decided that something with some stretch would be better. I had this heavy weight, stretch material left over from another project and constructed the lining from it.
After sewing together the lining and jacket at the front and neck, all that was left was a lot of handwork with hems and of course, adding the button.
Now I have a sharp looking jacket that's surprisingly heavy, mostly due to the lining. This will be just the thing for those blustery days to come.
Come back next week and find out what's up for Halloween. No ghouls here, just a cute costume for a little girl.


No comments:
Post a Comment